RFLink-ESP in Practice
11 August, 2018
23:11
Components
Now all the individual components are working, we're going to create the first full working system on this page and test how well everything works .
The system consists of:
- Domoticz Home Automation (on Windows, the next step is to move it to a Raspberry).
- Domoticz Lite, Domotica, DomoFence, FireFox as smartphone apps
- Wunderground weather information
- ESP32 programmed as an RFLink device
- QIAchip as 433 MHz receiver
- Doorbell button as the 433 MHz transmitter
- Several KaKu controllers and receivers
- Several QIAchip (EV1527) controllers and receivers
- Several PT2262 controllers and receivers
- Doorbell controller and receiver
Action | Serial Terminal |
Connect RFLink through an USB connection with a PC. In the future this is planned to be possible from a webpage. | |
Reboot RFLink either by command or reset button | 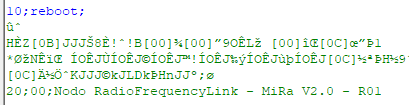
|
Enter Learning_Mode=1 And see that no device is yet registered | 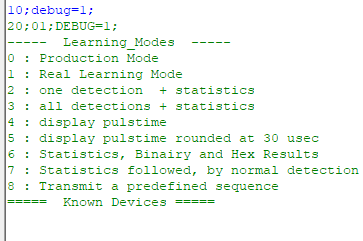
|
Press a button on a remote control. We see that the remote control is recognized but not registered | 
|
Press X And now the device is registered | 
|
OR Press Y And the device will be registered with pseudo random code (so the Home Automation software can determine what will happen if an RF-transmitter key is pressed. | 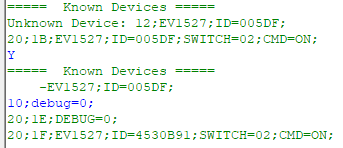
|
Repeat the last 2 steps for all other controlers that should be handled by Domoticz | 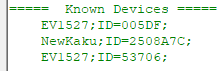
|
After all controllers are registered, connect the RFLink to Domoticz. | |
Connect the hardware to Domoticz
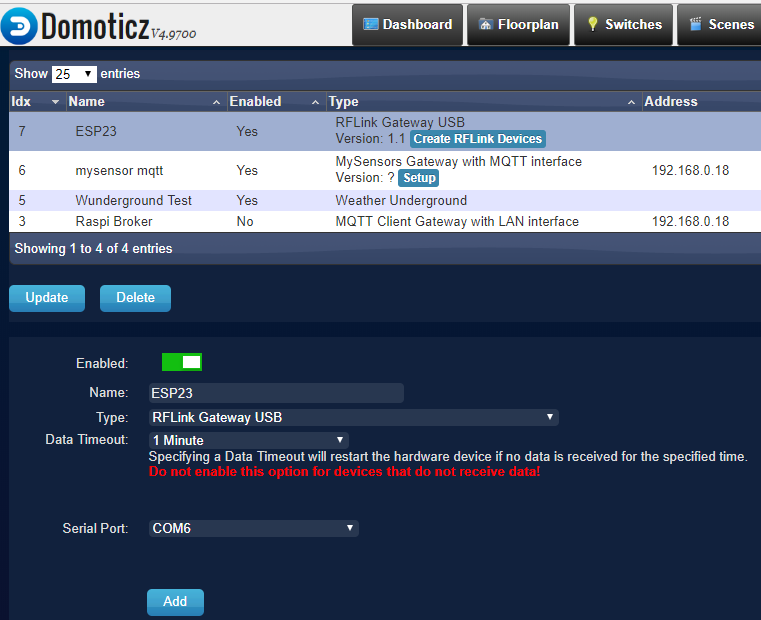
As the version is shown (not cirrectly, but that's a bug in Domoticz, you know that it's working.
You also can see in the log file, that it's connected::

Apparently there's some continuous handshake between Domoticz and RFLink, because if you hold the reset button of the ESP32 for more than one minute, the following appears in the log file:

Domoticz tests the availability of RFLink by sending on a regular base a Ping command and expecting Pong as an answer.
Action | Screen |
Add a KaKu switch (which is already registered in RFLink) to Domoticz. There are several ways but this is the most easy one I found. | |
Goto the switches tab and press Learn Light/Switch | 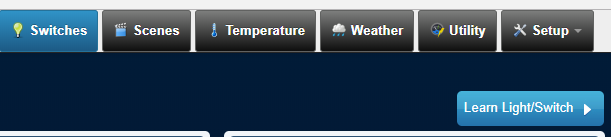
|
Press Learn Light/Switch | 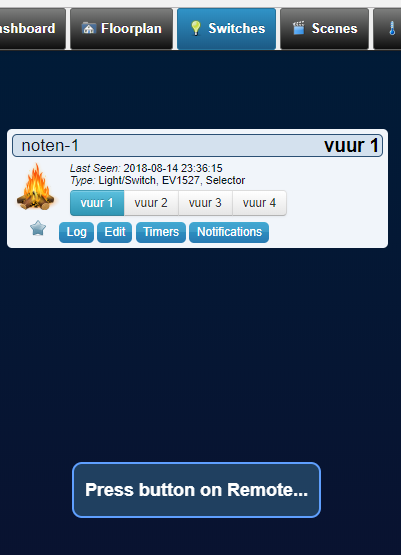
|
Now press the KaKu button Then fill in the popup shown on the right | 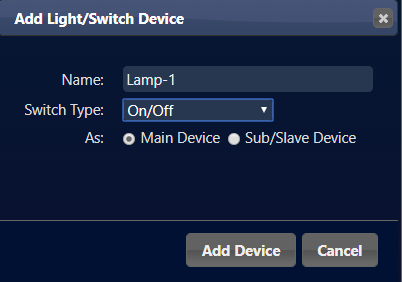
|
And you switch is implemented in Domoticz. | 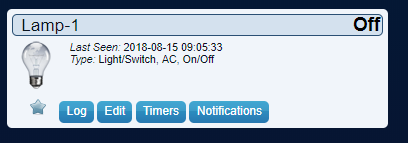
Screen clipping taken: 15-Aug-18, 9:07 |
Created with Microsoft Office OneNote 2007
One place for all your notes and information