Device
configuration.yaml
Result
MQTT
{"MHZ14_CO2_ppm":556}
mqtt:
broker: 192.168.0.18
sensor:
- platform: mqtt
state_topic: "huis/verdieping0/ergens/Temperatuur_Kalibratie_02_"
name: "CO2_IR"
unit_of_measurement: 'ppm'
value_template: '{{ value_json.MHZ14_CO2_ppm }}'

RFLink
rflink:
port: COM6
wait_for_ack: False
RFLink Auto Light
As soon as switches from RFLink are coming in, they are detected and automatically added.
light:
- platform: rflink
automatic_add: true

RFLink Switch
From automatic Auto Light you can read the device properties newkaku_2508a7c_a
switch:
platform: rflink
device_defaults:
fire_event: true
devices:
newkaku_2508a7c_a:
name: "Kamer Grote Lamp"

HTTP / REST-api
https://developers.home-assistant.io/docs/en/external_api_rest.html
For testing: Chrome extension Sureutils
Or
GET: /api/discovery_info
POST: /api/states/sensor.co3
Data: {"state":77}
{"base_url": "http://192.168.0.5:8123",
"location_name": "Home",
"requires_api_password": false,
"version": "0.76.2"}
{"attributes": {},
"context": {
"id": "165d57d2779648c6ad7d233e49d47861",
"user_id": null},
"entity_id": "sensor.co3",
"last_changed": "2018-09-04T18:05:13.390147+00:00",
"last_updated": "2018-09-04T18:05:13.390147+00:00",
"state": "77"}
Presence Detection
(by ping)
This is not a very solid method, there are better ones.
When the phones are detected, the file known_devices.yaml is filled and you change settings overthere.
device_tracker:
- platform: ping
hosts:
Raspi_1: 192.168.44.18
#Raspi_2: 192.168.44.19
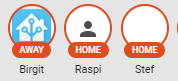
Birgit: 192.168.44.8
Stef: 192.168.44.9
In known_devices.yaml:
stef:
name: Stef
hide_if_away: false
mac: xx:xx:xx:xx:xx:xx
track: true
Hide the device_tracker
homeassistant:
customize:
device_tracker.stef:
hidden: true
Create an state dependant picture
sensor:
- platform: template
sensors:
stef:
friendly_name: Stef
#unit_of_measurement: 'status55'
value_template: "{{ states('device_tracker.stef') }}"
entity_picture_template: >
{% if is_state('device_tracker.stef', 'home') %}
/local/Stef3.png
{% endif %}
And after the picture trick:


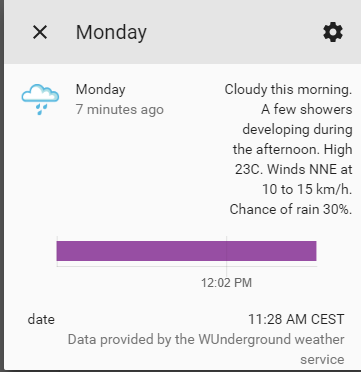
Wunderground
https://www.home-assistant.io/components/sensor.wunderground/
sensor:
- platform: wunderground
api_key: "xxxxx"
monitored_conditions:
- alerts
- dewpoint_c
- solarradiation
- pressure_mb
- location
- relative_humidity
- temp_c
- weather
- weather_1d_metric

And many more
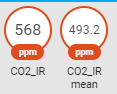
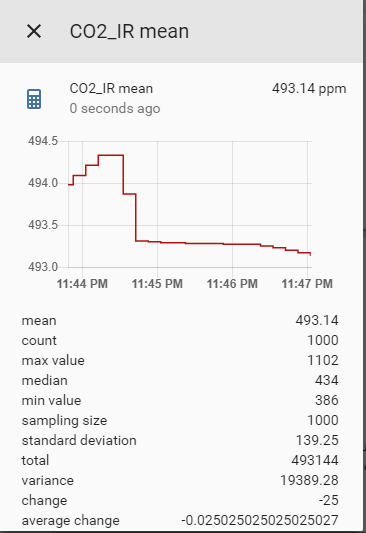
Statistics
Sensor:
- platform: statistics
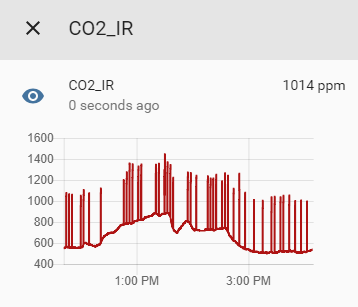
entity_id: sensor.CO2_IR
name: CO2_IR
sampling_size : 1000
History Statistics
Looks not so interessant
TV
Might need (if port 8001):
Pip3 install websocket-client
Couldn't get it working
TTS
Not tested
Cloud
Use a cloud service (Google / Amazone) to support speech control.
Not tested
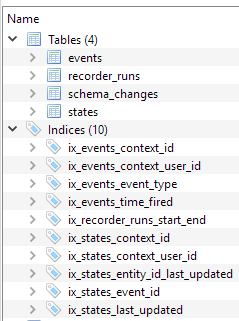
DataBase
Default an sql database is created.
This database is purged every N days.
(Don't know if prging can be disabled)
home-assistant_v2.db